

 I've talked before on my blog about my frugal grandmother. Grandma lived through the Great Depression and as a result she was extremely frugal for the remainder of her life. I remember going to her house after dark and every light was turned off except for one small bare bulb lamp in the kitchen. She always kept a dish washing tub in the kitchen sink and collected water there to flush the toilet at the end of the day.
She taught me a lot about frugality, and one of the things I learned from her as a teenager has saved me thousands of dollars over the last three decades and today I'm going to share it with you.
The Lost Art of Dental Floss Recycling
By the way, the items are linked to Amazon with my affiliate link and if you happen to purchase your supplies through Amazon I will earn a small percentage. Thank you!
Materials needed for this recycling project –
- Storage Container
- Tongs
- Paraffin wax, I recommend this one that my grandmother used: Royal Oak 972 Gulfwax Household Paraffin Wax
- Now Foods Peppermint Oil Certified Organic
- Parchment Paper
- Aluminum Foil
- 4 gallon trash bags
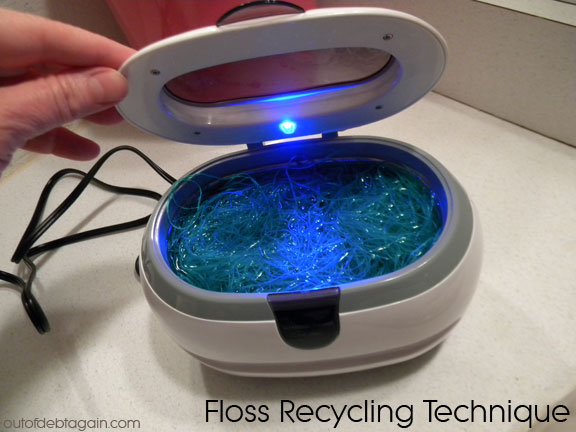
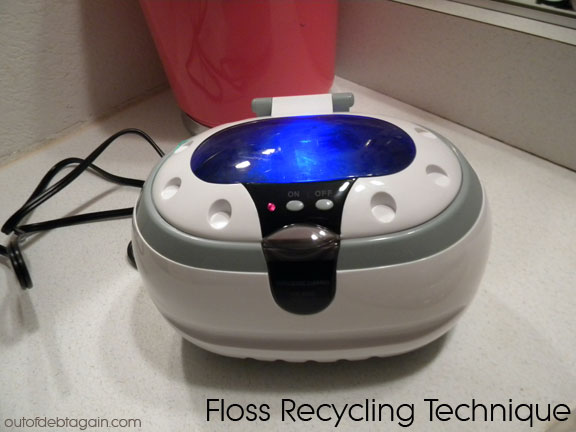
- Ultrasonic Cleaner (optional)
Step one for this project. You need to have someplace attractive in which to store your used dental floss. Grandma used an coffee can with a slit cut in the top but I like to use this pretty pink trash can.
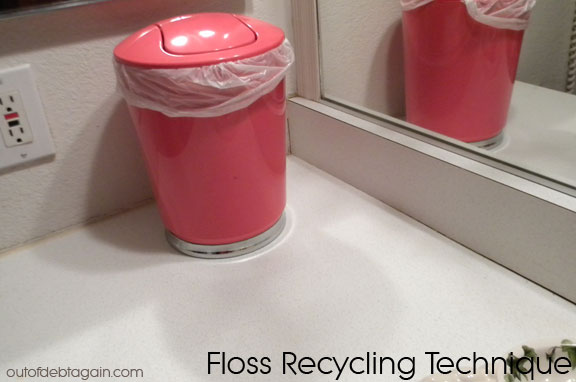
No one will ever guess what's inside, unless they get nosy and look. And then it's their own fault for being nosy. Amazon has this Umbra Mini Recycled Polypropylene Waste Can which is very similar, plus it is also recycled from polypropylene! My grandmother would have been so proud of me.

All right, let's get started. As you use your dental floss try to be a little more careful than you normally are with it. Try not to break it in half as you are jamming it in between your teeth. Grandma actually used to tie broken and torn pieces together but I decided to skip that step and I've still saved thousands of dollars in the last three decades. No telling how much money Grandma saved over the 93 years she was alive. If you wish to follow Grandma's lead, just trim the frayed ends and tie a double knot.
As you use your floss, tuck it into your recycling bin. I usually wait about two or three months to process one batch. Of course you could process more often but it is kind of a lengthy process so I like to wait until I've gathered up a big mass of floss. I actually like to call it my Floss Moss.
When you're ready to clean a batch, I always recommend using a good pair of tongs. I have a pair that I use for this purpose alone. If you don't use tongs, then you must at least use protective gloves because the bacteria that has been festering and growing on the floss in the last few months is practically a biological hazard at this time.
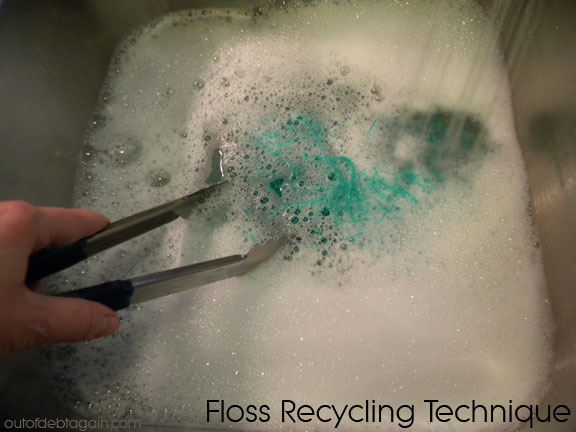
Wash your kitchen sink and fill with hot soapy water.
Next grab the mass of floss with your tongs. With practice you will find you can grab the entire mass at once.
Remove the bag from the recycling bin and throw it away. Replace the bag with a new one.

Drop the entire wad of floss into the soapy water. Continue to use the tongs and swish the floss around in the water.

Remove the floss using the tongs and drop into a colander which has been set aside for this recycling process. Or you can sterilize your regular colander after usage. I recommend having a colander used specifically for this recycling project.

Rinse with hot water from the faucet. Allow to drain for a few minutes.
After removing the floss, be sure to wash your sink with detergent and perhaps a few caps of bleach to disinfect it.
Still using the tongs, pick up the soggy wad of floss from the colander and place in a pan of water. Turn the heat to medium high and bring to a rolling boil, with the tongs in the water. This will also serve to disinfect the tongs for later usage.
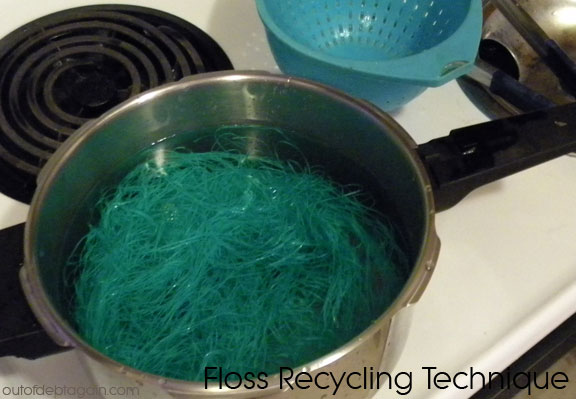
Reduce heat to a simmer and allow the floss to simmer for exactly 10 minutes. Any longer and you degrade the fiber, any less and you don't kill the biological hazardous bacteria.
After 10 minutes, use the tongs to remove the floss and lay it out on a thick clean towel.
This is an optional step. You may wish to skip past this one as Grandma did not use it, but I have incorporated over the years. I feel that using an ultrasonic cleaner is just one more step closer to getting the floss sparkling free from bacteria. Just stuff the floss into the device, fill with water until it's covered and turn it on. Mine only runs for two minutes and I let it go through ten cycles. I just set a timer for 2 minutes and go back in and turn it on for another two minutes.
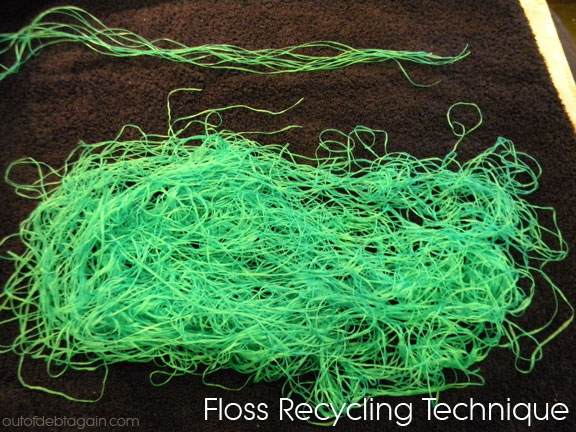
Okay, now go ahead and lay the floss out on a clean towel. Now you will begin the process of sorting out and detangling the floss into straight pieces.
When you have about ten pieces in a long straight section, place aside.
Once all the floss is detangled and straightened, you will need some way to dry it. Grandma used her clothesline and I use mine as well.
I usually put up a heavy blanket on two outer lines and place my floss on the inner line. This is to prevent neighbors from asking what that is on my line like they asked Mrs. Money at Ultimate Money Blog about her family cloths. Allow the floss to dry in the sun which will ensure that it is completely dry for storage.

After a few hours, carefully remove the floss from the clothesline and bring it inside.
I lay another towel out on the table and pull out a piece of aluminum foil, and parchment paper – longer than the length of the floss.
Lay the pieces of floss into a stack on the parchment paper. You might want to snip the one end so that it is neat and tidy.

Chip off a few pieces of the paraffin wax into a shallow pan and heat until melted. Drip wax across the length of the floss. Just about 20 drops here and there is good enough because you will be pulling the floss through to the end and the wax will lightly coat all of the floss.
Next you can use some kind of organic mint oil to drop across the length of the floss to give it that minty, fresh taste. I prefer Now Foods Peppermint Oil Certified Organic.
After you've dropped on about ten drops of mint oil, fold the parchment paper over the floss several times.
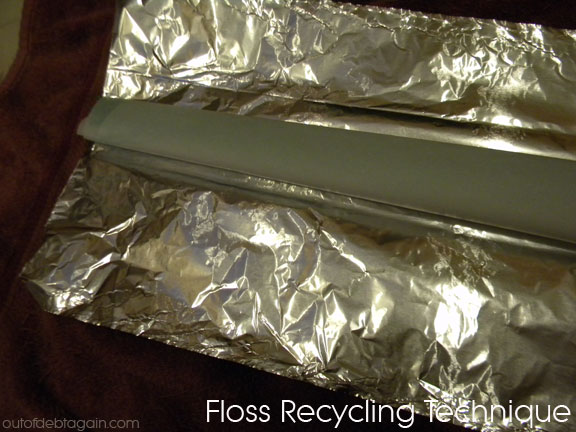
Finally, wrap the aluminum foil over the parchment paper. Leave one end open so that you can grab onto a piece of floss and pull out one at a time. It takes a little bit of practice to get used to the method but it will definitely be worth it when you see how much money you're saving on floss.

And there you have it.
I would love to hear from you in the comments if you have ever heard of this Floss Recycling Technique by any of your older relatives. I have asked around and no one has ever heard about it. I think my Grandma might be the genius inventor of this technique and I'm beholden to her for teaching me all about it.
Thanks for reading and please share with your friends and family and on your social networking groups so that everyone can learn this fabulous method and save themselves a bundle of money. It's super simple to share just by clicking one of the social networking buttons right below this post. Thanks!!
I kept waiting for you to say APRIL FOOLS, but you never did.
[Reply]
Mrs. Accountability Reply:
April 2nd, 2013 at 7:23 am
Hi Heidi, April Fool’s!! 🙂
Mrs. Accountability recently posted..How to Recycle Dental Floss Tutorial
[Reply]
HILARIOUS!!!!!!!!!!!! Love it!!!
Jessica recently posted..The Importance of Fermentation: An Interview with Sandor Katz
[Reply]
I never heard of that before! Pretty detailed too!
krantcents recently posted..My 2013 New Year’s Resolutions Update
[Reply]
thats just gross LOL
[Reply]
OK, I read the first bit of this, and had not seen the date it was published. I admit I scrolled through the post rather than reading, astounded that you would take so many steps and so much time to recycle this very inexpensive product.
Your images are amazing, and I fell for it. Thanks!
Mrs. 1500 recently posted..10 Questions with Planting our Pennies
[Reply]
Mrs. Accountability Reply:
May 8th, 2013 at 11:39 am
Mrs. 1500, haha!! Glad you fell for it. I am still laughing about the silliness of doing something like this. Sometimes people can go a bit far in recycling and this was just a way for me to poke a little fun. My best, Mrs. Accountability
Mrs. Accountability recently posted..Save Money by Changing Your Car’s Windshield Wipers & Air Filter Yourself
[Reply]
OH THANK GOODNESS……… I was reading this and thinking OMG she is out of her mind. I had images of bacteria floating around and the time you were taking………… and I was just about to go to a different page so I didn’t have to comment “ARE YOU CRAZY” when I read it was an April’s Fools Joke. Good thing I read to the end or this would have been one of those “crazy lady” stories I would have repeated!
[Reply]
Mrs. Accountability Reply:
June 8th, 2013 at 12:23 pm
LOL, it’s okay if you repeat it. That would be fabulous to have my post turned into one of those “famous urban legends”. LOL. Glad you enjoyed it!
Mrs. Accountability recently posted..Save Money by Changing Your Car’s Windshield Wipers & Air Filter Yourself
[Reply]